Docs
Shopify integration
Connect your Shopify store to Alovia to push AI-generated product images into your Shopify Files library. Setup uses a custom app you create in Shopify's Dev Dashboard, a 16-step one-time walkthrough. Alovia then reads your existing products and exports generated images individually or in bulk. Catalog and order sync aren't available yet — the integration covers image export only.
Connect your Shopify store to Alovia to push AI-generated product images into your Shopify Files library. Setup uses a custom app you create in Shopify's Dev Dashboard, a 16-step one-time walkthrough. Alovia then reads your existing products and exports generated images individually or in bulk. Catalog and order sync aren't available yet — the integration covers image export only.
What connects, and in which direction
The Shopify Connection tab authenticates a custom app — a Client ID and Secret you generate in your own Shopify admin. Once connected, Alovia can read your existing product catalog from Shopify, and can push AI-generated images into your store's Files library, either one at a time or in bulk.
One-time setup: creating a custom app
Connecting requires a 16-step, one-time walkthrough in Shopify's Settings -> Apps -> Develop apps -> Dev Dashboard: create an app, grant it the Products and Files scopes, then paste its Client ID and Secret into Alovia's Shopify Connection tab. The full illustrated walkthrough is below.
Exporting images to Shopify
From the catalog builder's export step, export a single placed image to your Shopify Files library, or use bulk export to push every image in a finished layout at once. Exported images land in Shopify Files, ready to attach to a product listing.
What's not included yet
Alovia's Shopify integration is image export only today. Automatic two-way catalog sync — pushing SKUs, prices, inventory, or orders directly into your Shopify store — is not available yet.
Illustrated setup guide
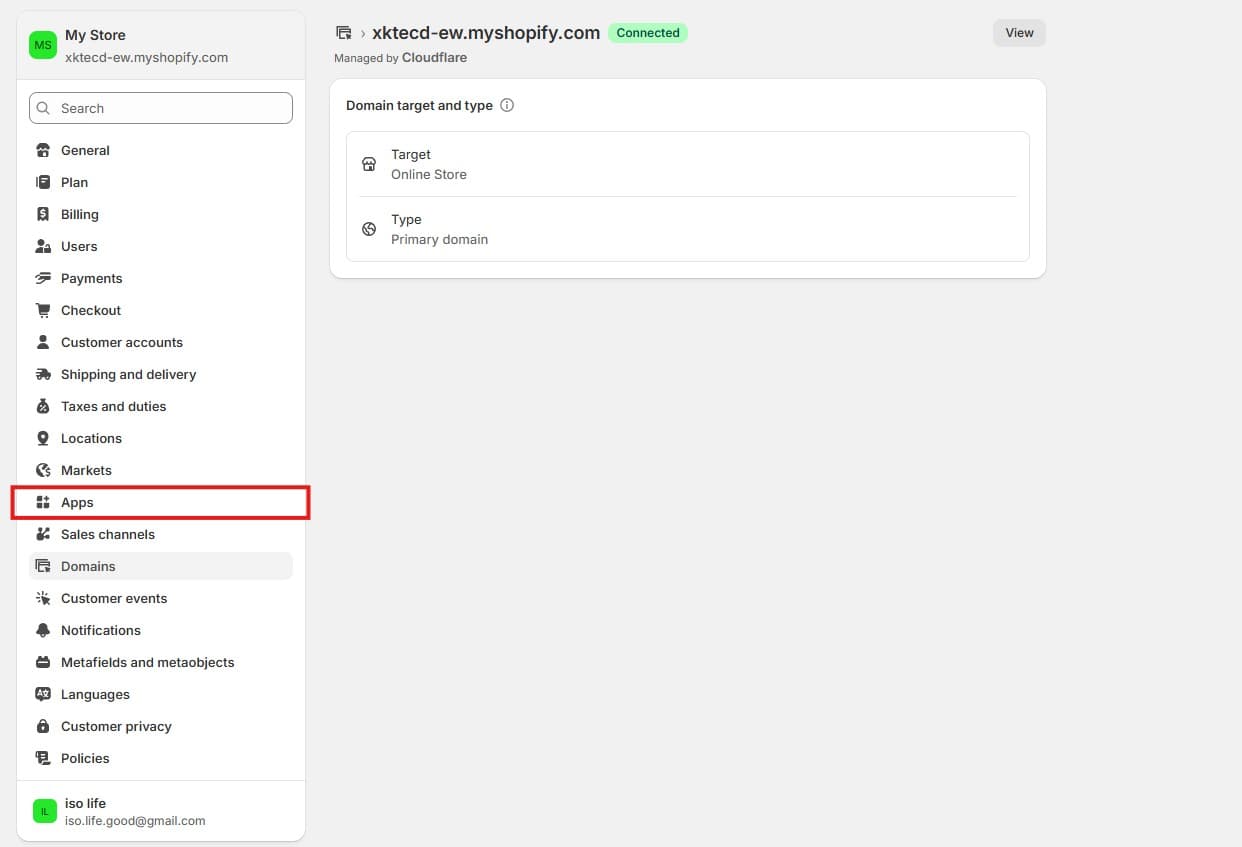
Open Settings → Apps
In your Shopify admin, go to Settings, then click Apps in the left sidebar.
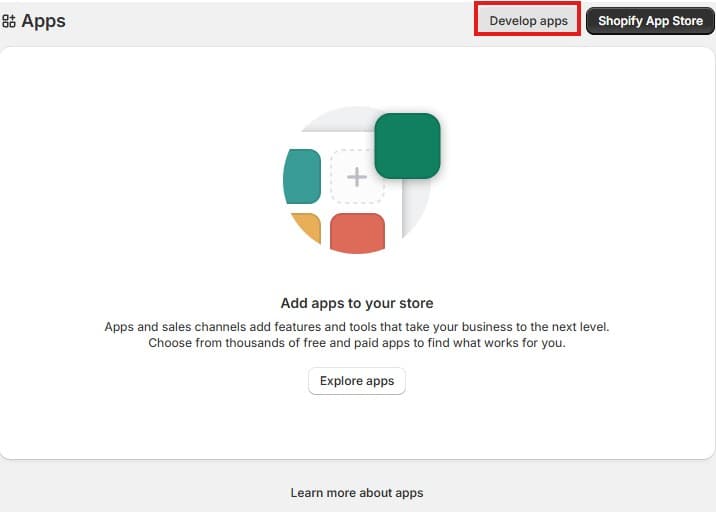
Click "Develop apps"
On the Apps page, click Develop apps in the top right corner.
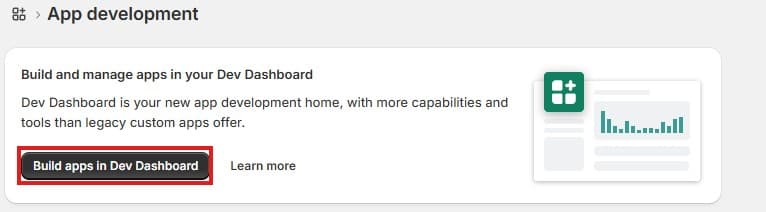
Build apps in Dev Dashboard
Click Build apps in Dev Dashboard to open Shopify's new app development console.
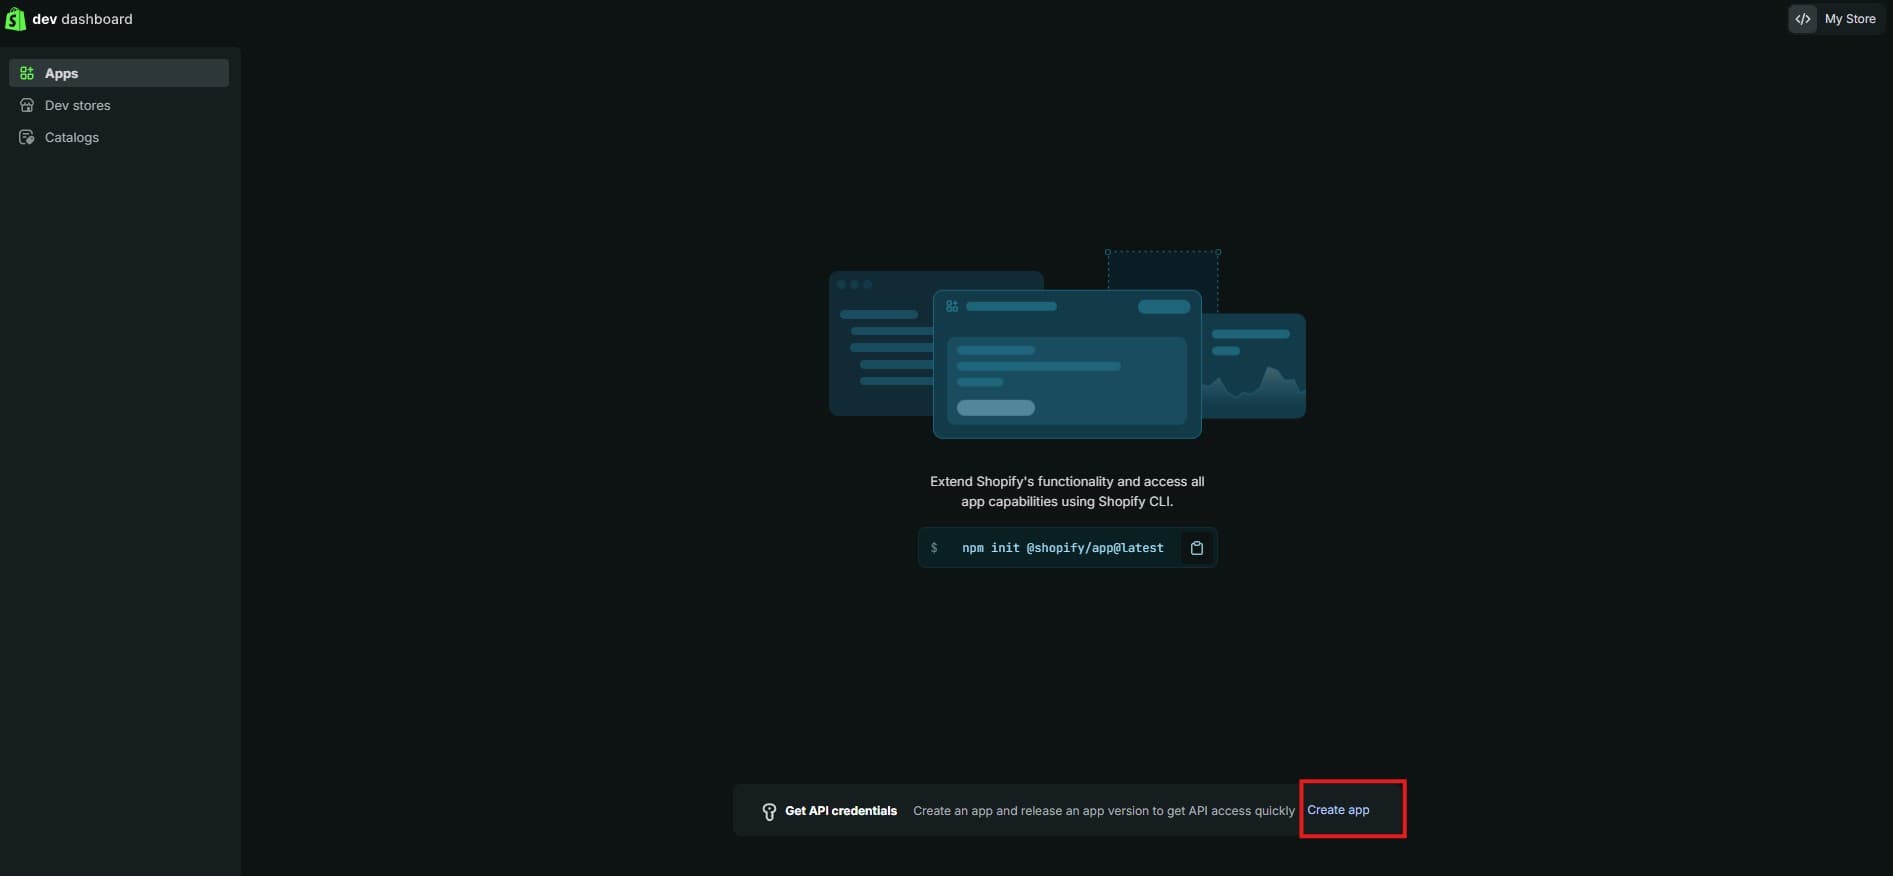
Create a new app
In the Dev Dashboard, click Create app under Get API credentials.
Name your app
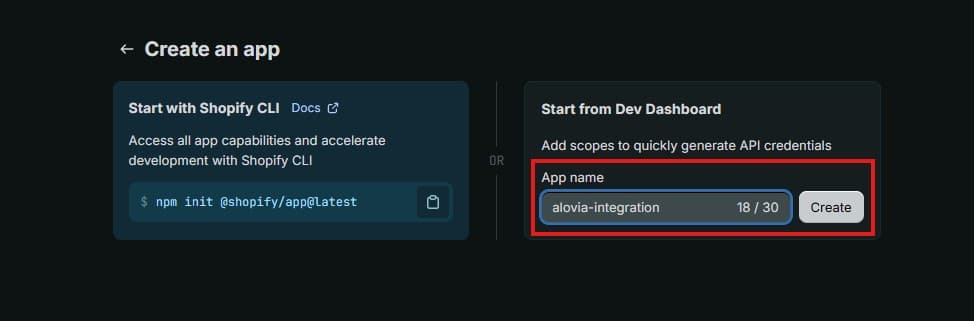
Under "Start from Dev Dashboard", type a name for your app (e.g. alovia-integration) and click Create.
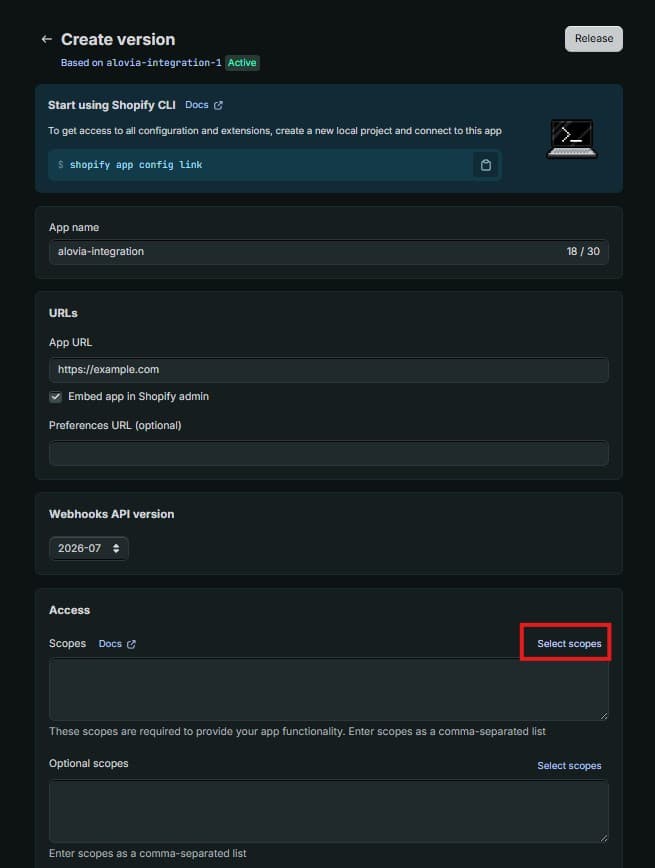
Open the Access section
On the app's version page, scroll down to Access and click Select scopes.
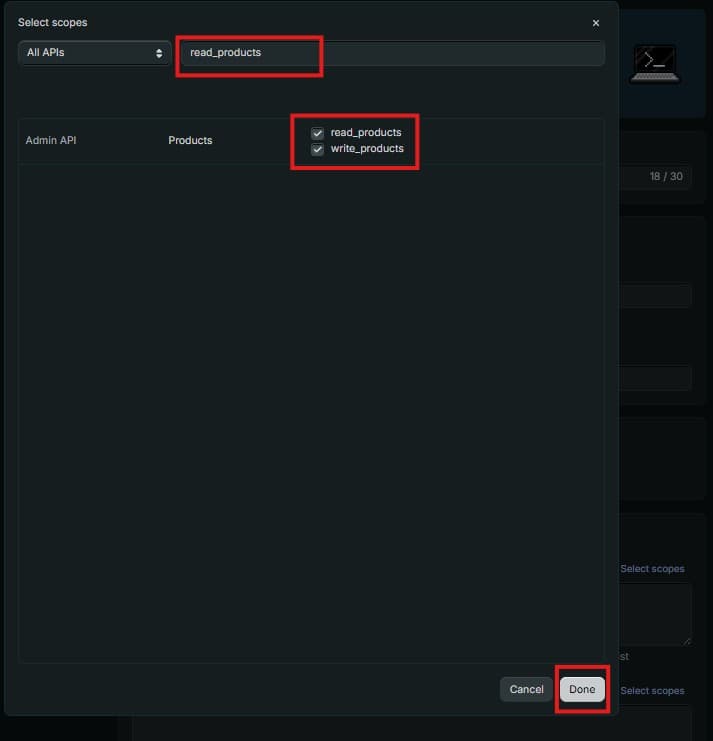
Add product scopes
Search for products, then check both read_products and write_products. Click Done.
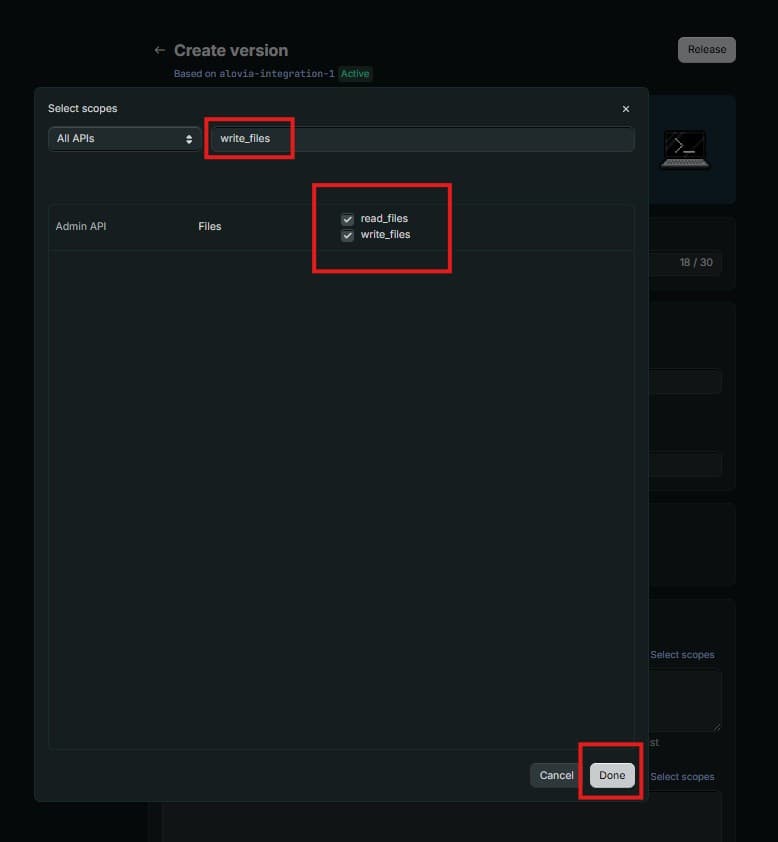
Add file scopes
Search for files, then check both read_files and write_files. Click Done.
Review the scopes
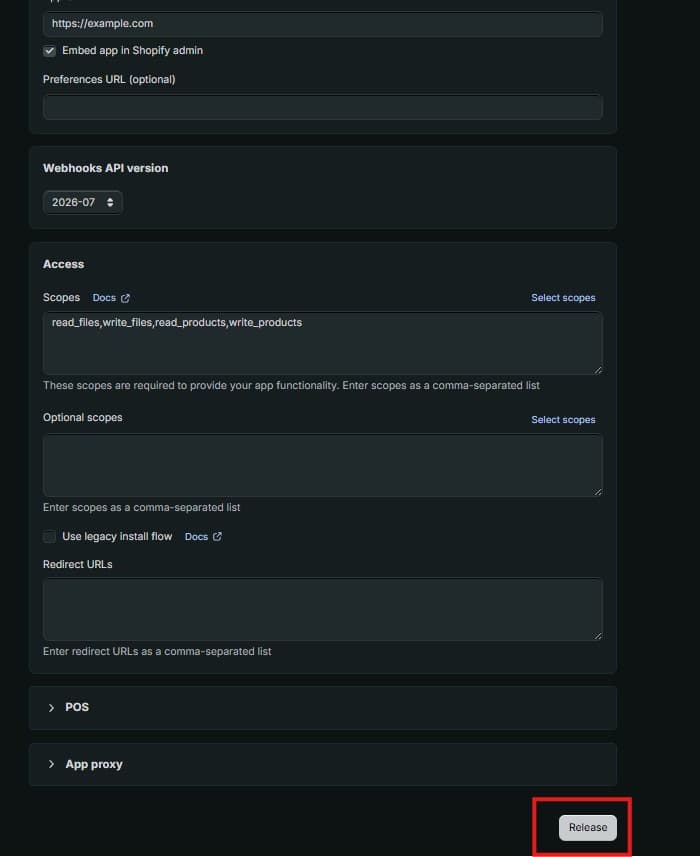
Confirm the Scopes field lists read_files, write_files, read_products, write_products, then click Release.
Confirm the release
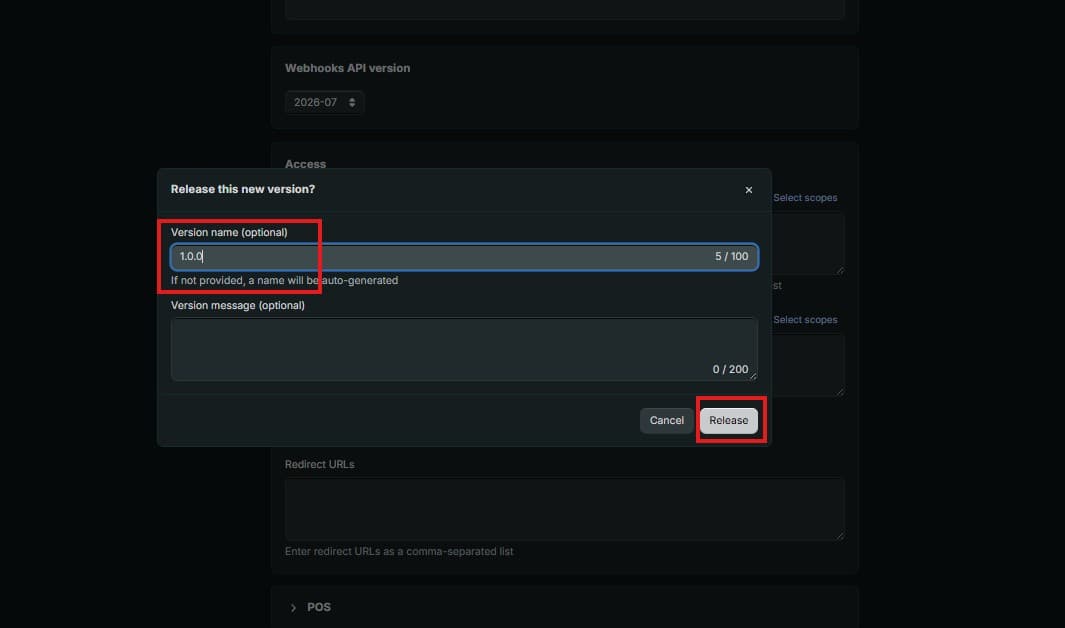
Give the version a name (e.g. 1.0.0) and click Release to publish it.
Copy Client ID and Secret
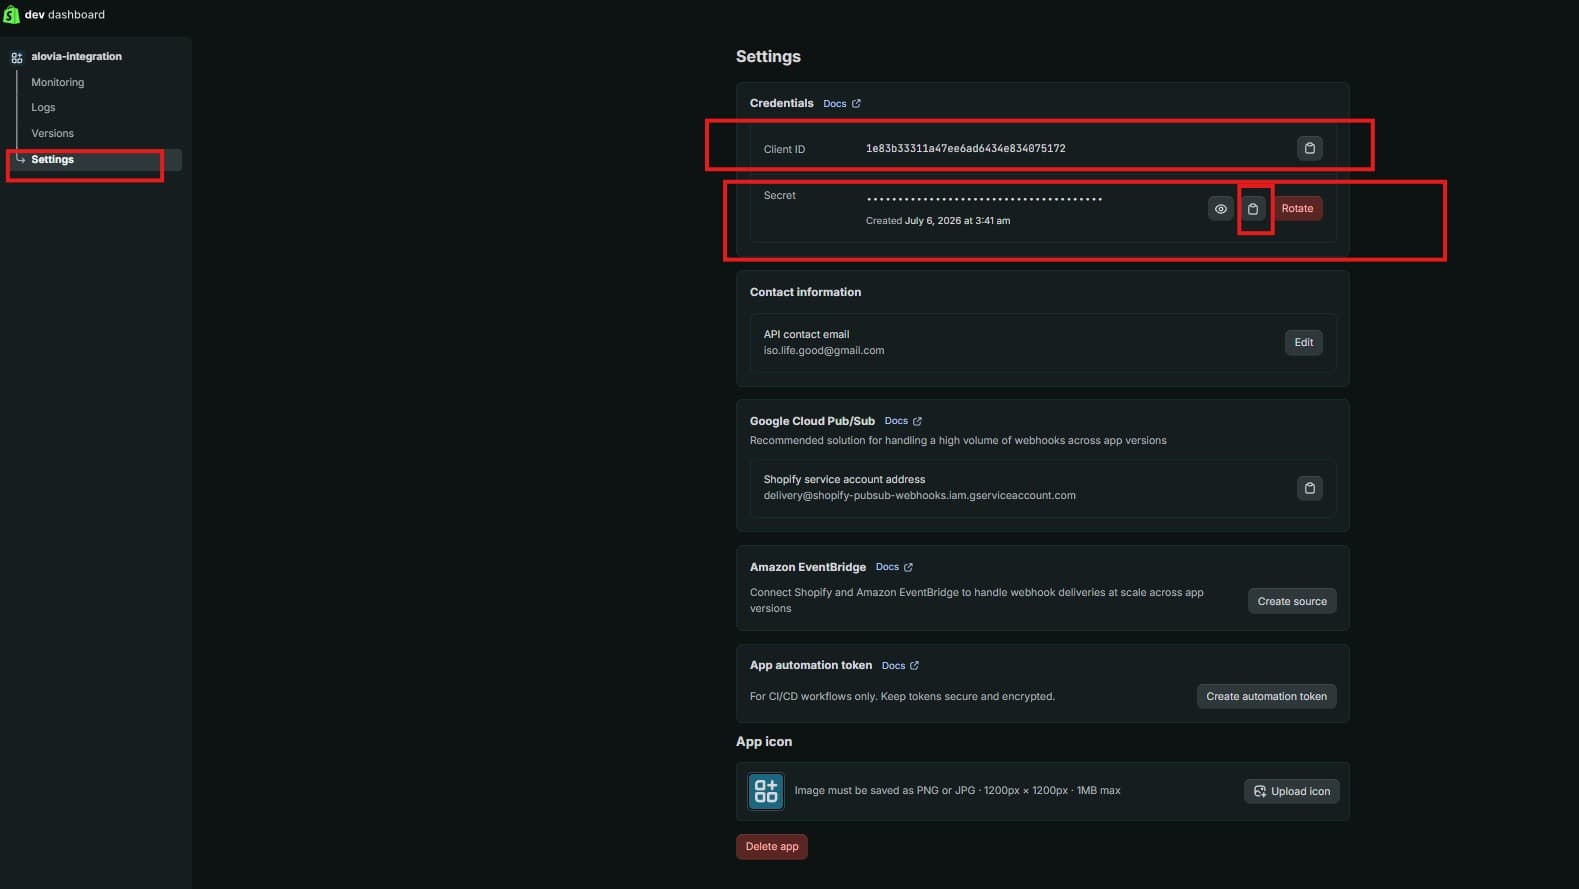
Go to Settings in the app's sidebar. Copy the Client ID, click the eye icon to reveal the Secret, then copy it too.
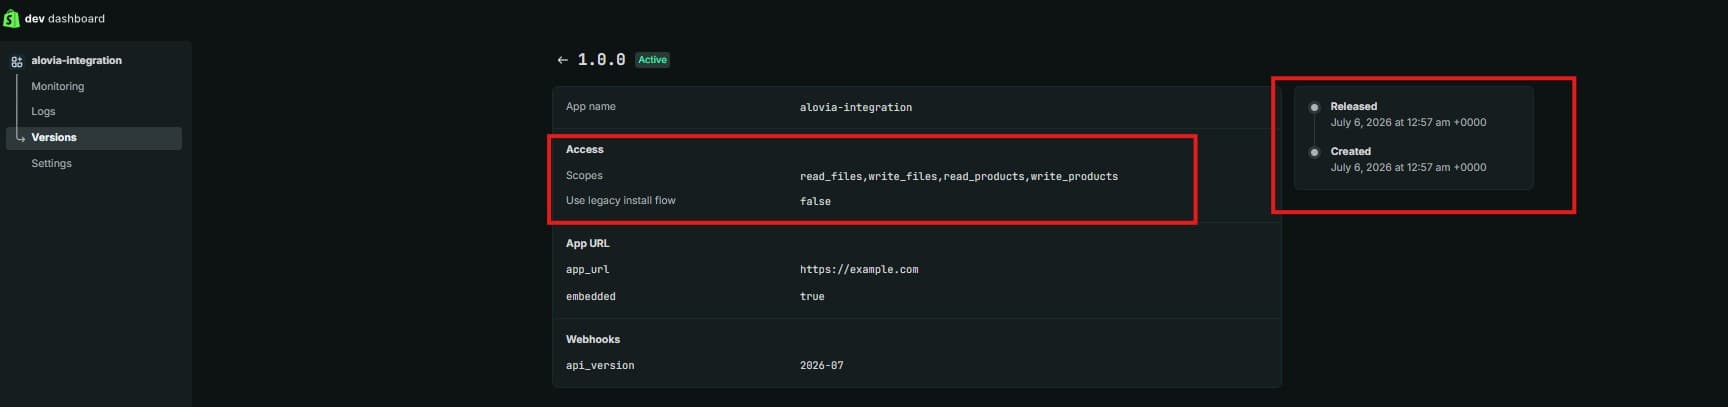
Verify the version is active
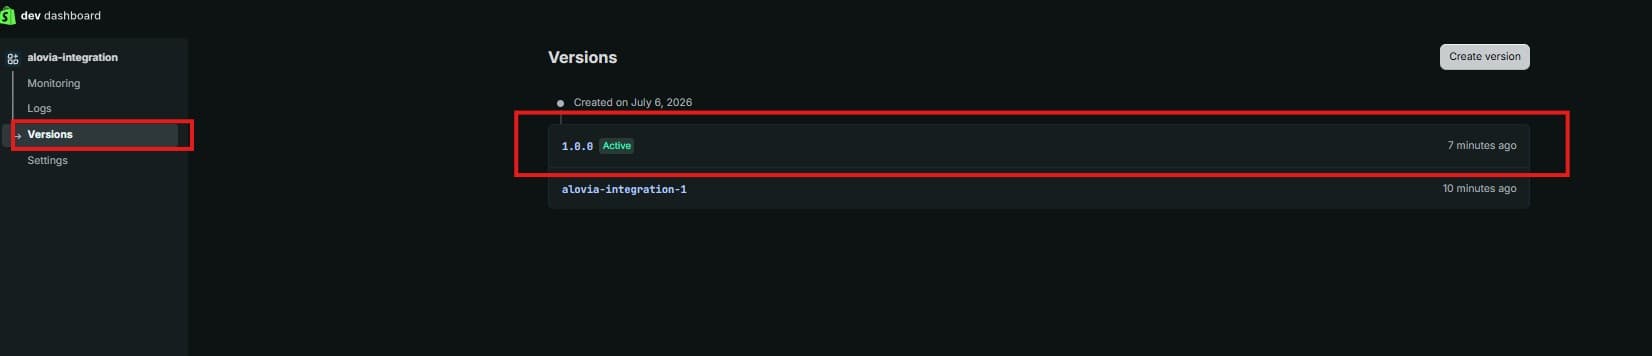
Under Versions, confirm your new version shows the Active badge.
Double-check the scopes
Open the version to confirm the released scopes exactly match read_files, write_files, read_products, write_products.
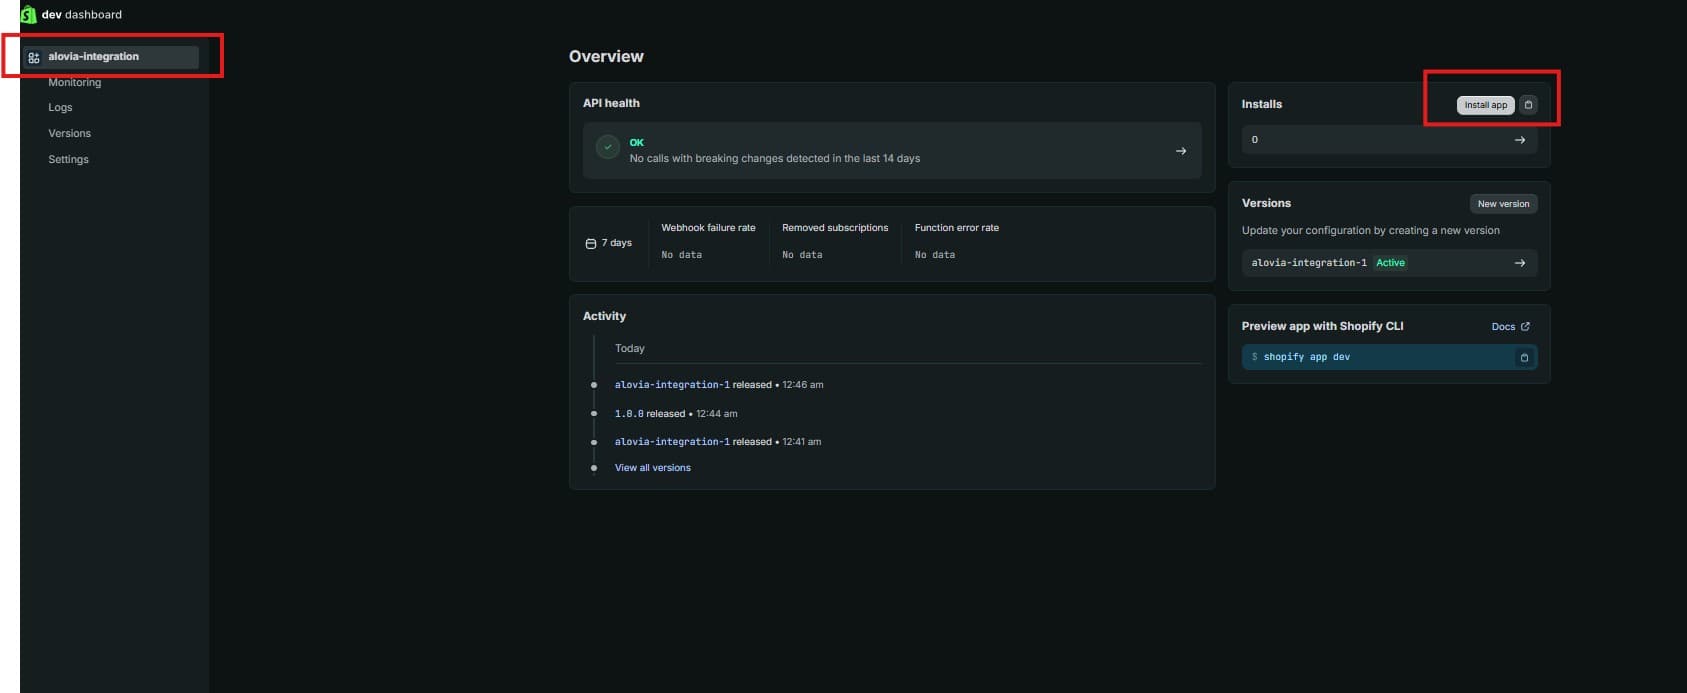
Install the app
From the app's Overview page, click Install app in the top right.
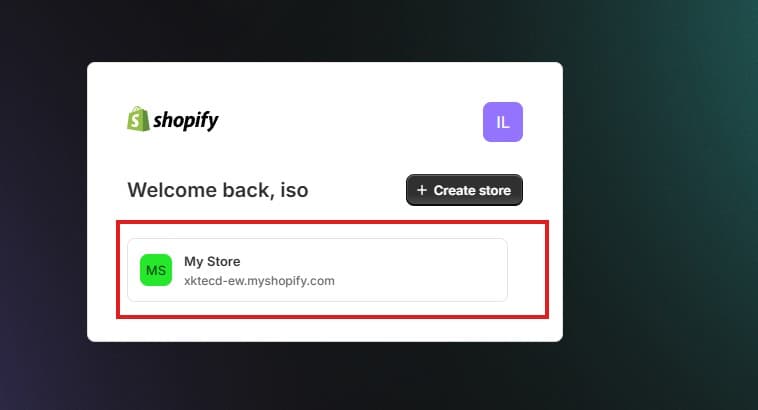
Pick your store
Choose the store you want to connect (e.g. My Store) from the list.
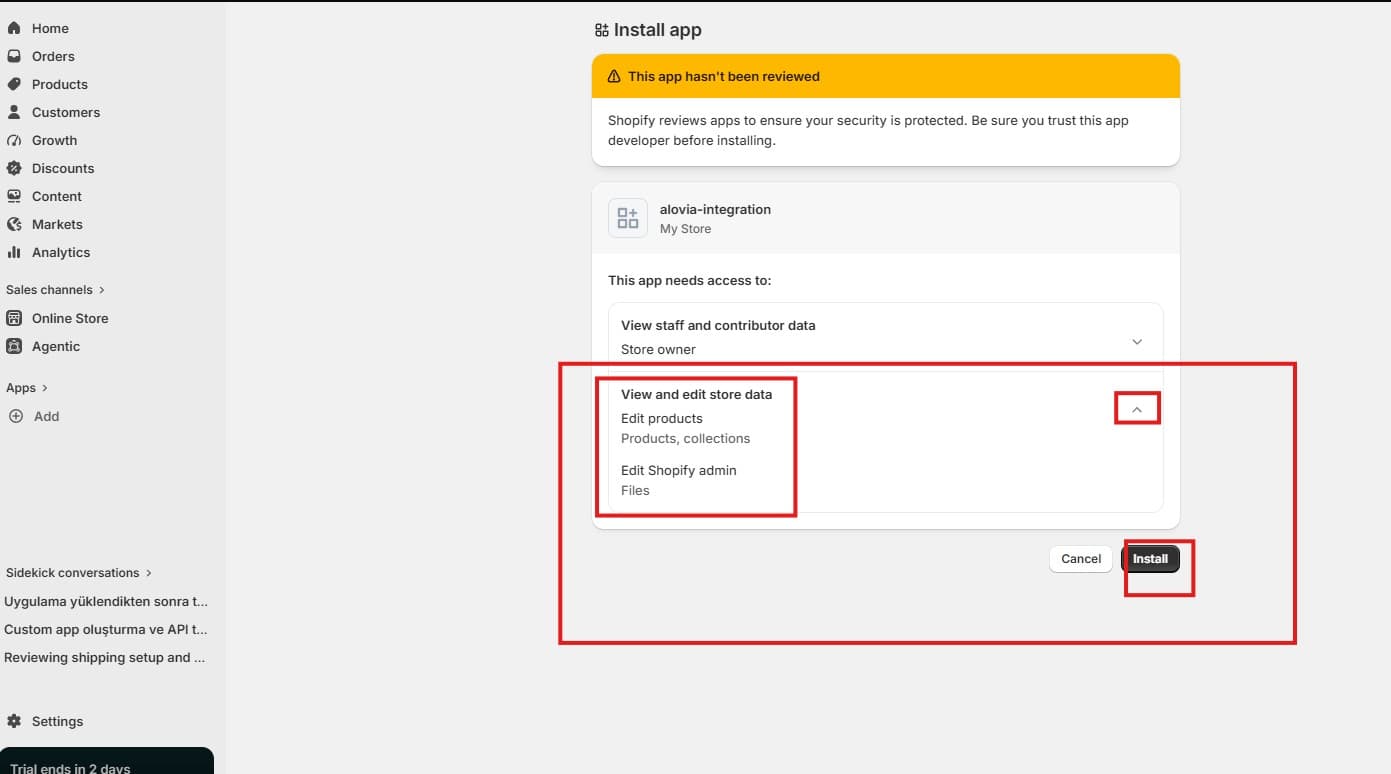
Approve permissions
Review the requested permissions (Products and Files) and click Install to finish.
Related
Ready to connect your Shopify store?
Everything above reflects what Alovia ships today.
Last updated: